First, the animation file was going to be specific to this skeleton - if another skeleton was build, in terms of bone structure, it would have to use a different animation file.
There are actually 21 bones in my skeleton design - 20 visible, and 1 zero length bone, at the waist of the skeleton, that isn't visible, but is the only bone that could be moved directly. All other bones always started from their parent's end position.
I had long decided that frame-based animation was the way to go. So the first part was storing the data that would uniquely determine a skeleton's rotations and position.
For the zero-length center bone, I stored the position and rotation. For all other bones, only storing the rotation was enough.
This meant that the animation could be applied to any skeleton that had the same number of bones as this. Further, it could be meaningfully applied to any skeleton that had the same parent-child bone structure. This is important because, for example, modeling human or humanoid children, you'll find that they have the same bone structure, but for them, the bone lengths are in different proportions.
For adults of different heights, a simple scale would suffice, because the bone length proportions are the same (or nearly so that it doesn't make a difference).
Besides storing bone rotation, each frame also had to store some other information for it's animation.
I decided each frame would have a "wait time" which is the time we pause on that frame, and a "transition time" which is the time to move from this frame to the next.
To animate a skeleton then, would be a matter of interpolating between two frame's sets of stored angles and position.
However, a straight forward linear interpolation would look unnatural. When we move our limbs, or any real object for that matter, there's the notion of inertia. It takes time for an object to come up to speed, and for it to slow down before coming to a rest. With linear interpolation, the movement would "jump" up to a certain rate, remain at that rate for the entire animation, and then suddenly stop when it reached it's end position. This would look VERY unnatural.
Those of you who have done any sort of frame-based animation would probably be familiar with "easing" equations. It's simply a function that ranges from 0 to 1. For example, this is what linear interpolation looks like as such a function:(images from the free PowerToy calc)
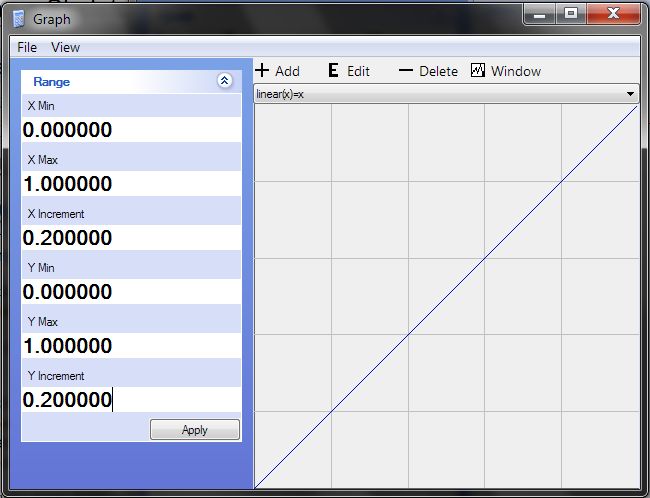
Note that the function should only be defined to work on the range of [0,1].. The derivative, or slope, of the function is the speed of movement. Since the slope is the same for this entire function, movement sped is constant through the entire time of animation.
There are two simple ways to do what's called Easing in and easing out - that is to use a quadratic function:

Notice how the Ease In function's slope (first graph), starts off low, and increases linearly until reaching the end point. Any motion guided by this function would then slowly accelerate towards it's destination, and suddenly stop once it reaches it.
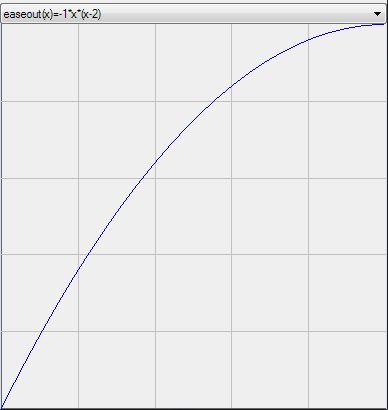
Similiarly, the ease out function's slope starts off at 1, and slowly diminishes until reaching the end point of 1. It does the opposite, it starts off suddently, and slows down until reaching the end.
Now in order to combine both easing in and easing out, we have to combine two functions, which can be done with a simple IF statement in the code. The two functions are this:
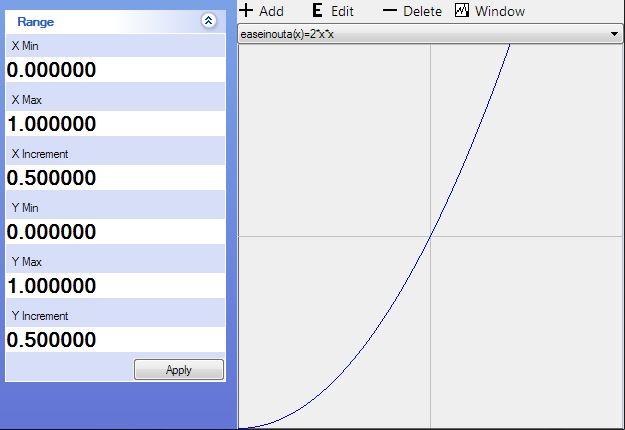
and
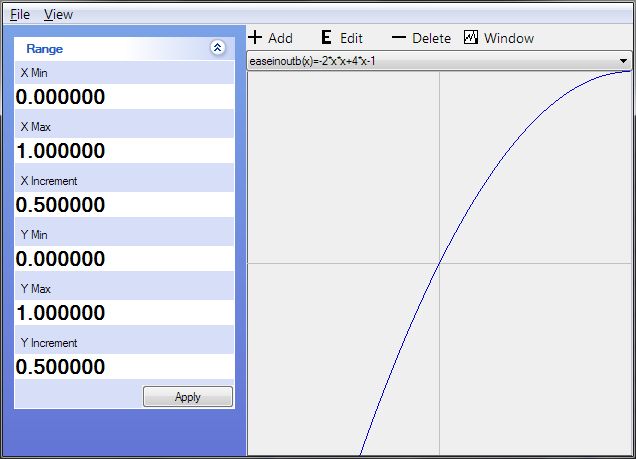
When combined, with, (if x < 0.5) else , you essentially get a function that looks like this:
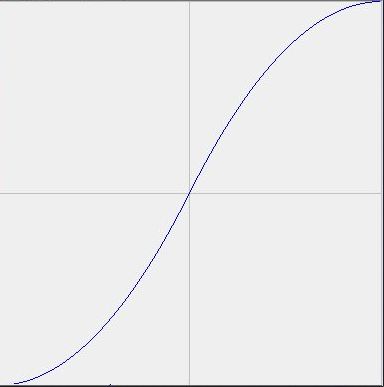
The above combination provides for very nice movement, as it somewhat realistically models how we move our limbs. Notice that the two functions not only have the same value at 0.5 (i.e. both reach "halfway" at 0.5), but also have the same slope at 0.5, meaning the motion speed won't have any jerky effects at all.
There are actually cubic and sinusoidal ease-in and ease-out functions, but for simplicity and quicker calculations i stuck with quadratic.
So, that's the four types of motion I decided to have.
Combine a bunch of frames together, and you have an animation. With all that work done, my final skeleton animator looked like this:
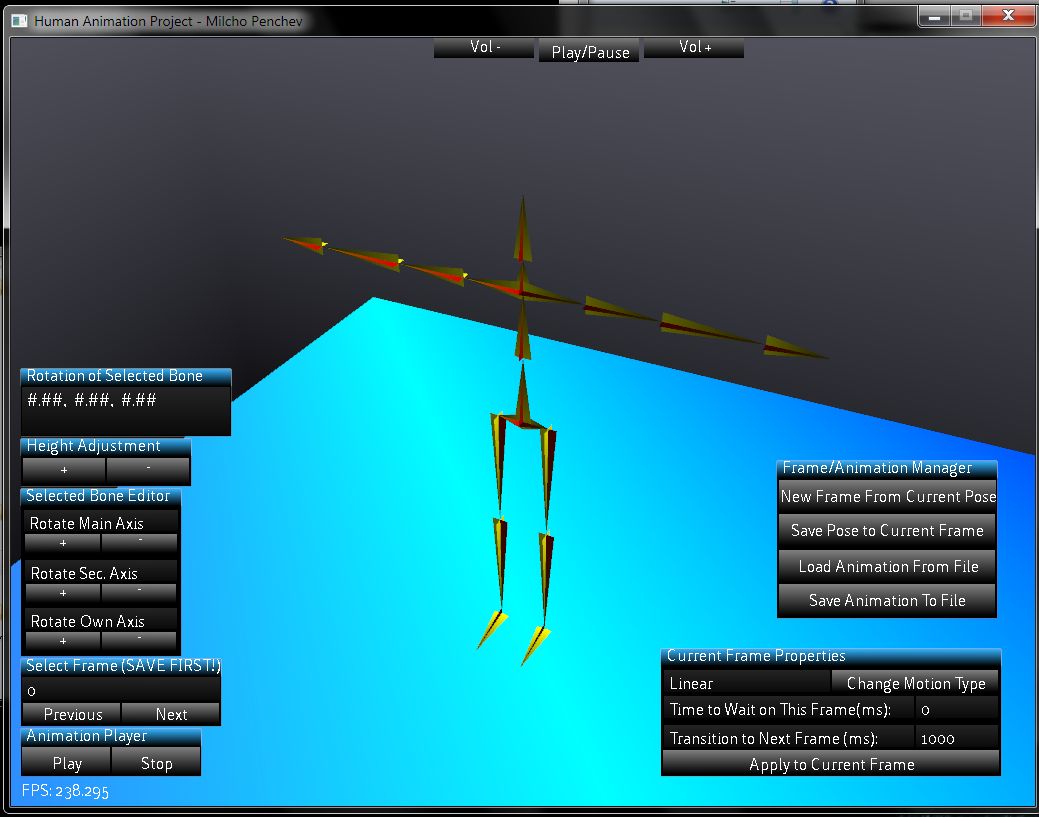
The current frame properties is where all the different properties of a frame are set. Everything else is related to editing the skeleton, by individually rotating each bone. The animations are then saved to a file, and are easily read and applied to a skeleton by the Skeleton Animator class.
That covers my work towards animating the skeleton. The next parts will focus on animating a model from the skeleton animation.